keytool.exe -genkey -alias juheon -keyalg RSA -keypass 1234qwer -storepass 1234qwer -keystore juheon.jks keytool.exe -export -alias juheon -storepass 1234qwer -file juheon.cer -keystore juheon.jks keytool.exe -importkeystore -srckeystore juheon.jks -destkeystore juheon.key.p12 -deststoretype PKCS12 D:\Java\32bit\jdk1.5.0_22\jre\lib\security\cacert D:\Java\32bit\jdk1.5.0_22\bin\keytool.exe -import -alias tsasample -keystore D:\Java\32bit\jdk1.5.0_22\jre\lib\security\cacert -file D:\workspace\Servers\tsa-server-web-config\tomcat.cer keytool -import -alias somansa -keystore C:\Program Files\Java\jdk1.8.0_102\jre\lib\security\cacert -file c:\somansa.cer #인증서 생성 keytool -genkey -alias keyAlias -keyalg RSA -keypass changeit -storepass changeit –validity 9999 -keystore keystore.jks keytool -export -alias keyAlias -storepass changeit -file server.cer -keystore keystore.jks keytool -import -v -trustcacerts -alias keyAlias -file server.cer ...
가장 유명한 Http WebServer인 apache를 설치해본다.
1. 다운로드
http://httpd.apache.org/download.cgi 로 가면 apache 제단에서 공식 배포하는 apache를 받아 빌드하여 사용할 수 있다. 나는 윈도우를 사용하는 중이므로 일단 윈도우에 설치해본다. 대부분의 개발자들은 윈도우에서 빌드 할 생각이 없을것이다.
감사하게도 착하신 분들이 윈도우 환경의 Visual Studio 버젼, window bit 별로 빌드를 하여 설치본을 배포해주신다. http://www.apachelounge.com/download/ 사이트로 가면 윈도우 및 모듈들도 컴파일하여 제공하고 있다.

"httpd-2.4.25-win64-VC14.zip"를 받아 본다.
2. 설치
httpd-2.4.25-win64-VC14.zip 압축을 푸니 폴더 구조가 아래와 같다.

ReadMe.txt 파일을 열어보면 build를 어떻게 했니, 어떤 시스템에서 돌아 가니 등등의 정보들이 있다. 기본 System root 경로는 C:\Apache24로 잡혀있으며 Document root 또한 C:\Apache24\htdocs 경로로 잡혀있다. 다른 경로로 변경할 경우는 httpd.conf 파일의 ServerRoot 와 DocumentRoot 경로를 변경해야한다.
3. 실행
나는 기본 설정을 이용할 것이므로 "Apache24" 폴더를 C:\으로 이동하였다. 이동후 구동해보니 아래와 같은 경고창이 나를 반긴다.
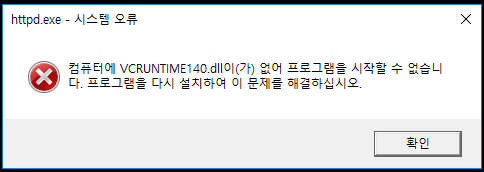
내 PC에는 Visual C++ 재배포 가능 패키지가 설치되어 있지 않아서 위와 같은 경고창이 뜬다. Visual C++ 재배포 가능 패키지는 Visual Studio 2015를 사용하여 빌드된 C++ 응용 프로그램을 실행하는 데 필요한 런타임 구성 요소이다.
Visual C++ 재배포 가능 패키지를 다운로드를 받고 설치하면 콘솔창이 뜨면서 웹서버가 실행된다.

뭐라고 에러가 뜨긴하지만 http://localhost/로 접속해보면 "It works!" 라고 뜬다.

"Could not reliably determine the server's fully qualified domain name" 오류는 httpd.conf 파일에 ServerName 설정을 하지 않아서 나는 메시지 이다.
httpd.conf
...
# ServerName gives the name and port that the server uses to identify itself.
# This can often be determined automatically, but we recommend you specify
# it explicitly to prevent problems during startup.
#
# If your host doesn't have a registered DNS name, enter its IP address here.
#
#ServerName www.example.com:80

ServerName localhost:80
...
위와 같이 서버명에 값을 입력하면 메시지는 발생하지 않는다.
댓글
댓글 쓰기